Microvia HDI PCB Board FAQ
Why should I turn to HDI PCB board technology?
HDI (high density interconnection) circuit boards and Microvia HDI Technology are inextricably linked. Microvias HDI PCBs are minute holes drilled by a laser to generate the electrical connection between the layers in a multilayer circuit board.
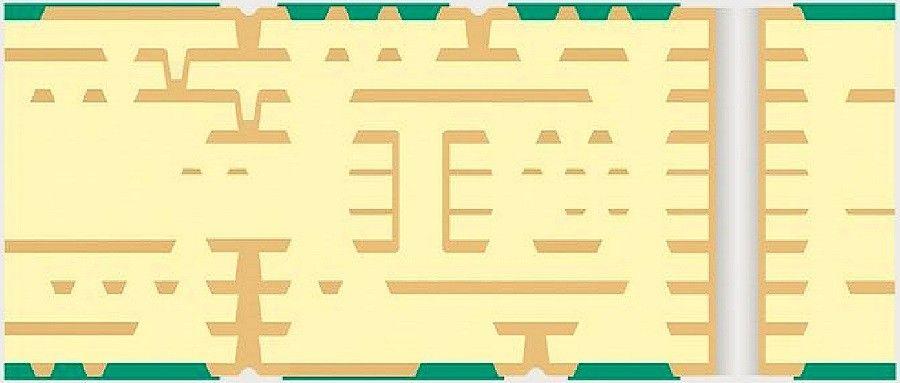
High-density interconnect, or HDI, circuit boards are printed circuit boards with a higher wiring density per unit area than traditional printed circuit boards (PCB).
In general, HDI PCBs are defined as PCBs with one or all of the following: microvias; blind vias, buried vias or other microvia technique; built-up laminations and high signal performance considerations. Printed circuit board technology has been evolving with changing technology that calls for smaller and faster products. HDI products are more compact and have smaller vias, pads, and lines and spaces. As a result, HDIs have denser wiring, which means lighter, compact, lower layer count PCBs. Rather than using a few PCBs in a device, one HDI board can house the functionality of the previous boards used.
At some level of circuit complexity, turning to an architecture with blind and buried vias will result in better yield and lower cost than would a through-hole design. In this presentation, we discuss several design examples and illustrate the relative costs and benefits of different architectural approaches.
How does HDI PCB keep my cost down?
One of the problems designers face is keeping cost down. Our goal is to provide some insight to help you with your decision-making process. When making PCB-design decisions for HDI, one of the primary concerns is in regards to manufacturability and cost. Just like standard PCB designs, HDI boards have four main concerns:
– Materials
– HDI Structures
– Layers and laminations
– Vias in HDI classes
– Optimal trace and space
How do I select materials for HDI?
Advanced multilayer technology allows for designers to sequentially add additional pairs of layers to form a multilayer PCB. The use of a laser drill to produce holes in the internal layers allows for plating, imaging and etching prior to pressing. This added process is known as sequential build up. SBU fabrication uses solid filled vias allowing for better thermal management, a stronger inter connect and increasing the board's reliability.
Resin coated copper was developed specifically to aide with poor hole quality, longer drill times and to allow for thinner PCBs. RCC has an ultra-low profile and ultra-thin copper foil that is anchored with minuscule nodules to the surface. This material is chemically treated and primed for the thinnest and finest line and spacing technology.
The application of dry resist to the laminate still uses heated roll method to apply the resist to core material. This older technology process, it is now recommended to preheat the material to a desired temperature prior to the lamination process for HDI printed circuit boards. The preheating of the material allows for better a steady application of the dry resist to the surface of the laminate, pulling less heat away from the hot rolls and allowing for consistent stable exit temperatures of the laminated product. Consistent entrance and exit temperatures lead to less air entrapment beneath the film; this is critical to the reproduction of fine lines and spacing.
What should I keep in mind when choosing layers and laminations?
When thinking about layers and laminations, keep in mind the following questions: Have you planned your layer sequencing for reduced EMI? Have you decided your routing density? What is the total number of sequential laminations? And have you minimized your laminations?
What should I keep in mind when choosing my via structure?
Manufacturability primarily has to do with via structure. Answer the following questions before you start working on your next project: Are you meeting the design guidelines for microvia aspect ratio? Are you stacking or staggering your microvias?
Types of HDI Stack-Ups
There are several types of HDI stackups, or classes, that you may want to use for your design.HDI PCBs have a much higher wiring and pad connection density than traditional PCBs, due to their design constraint. The structural build up is explained below.
1+N+1 - PCBs contain 1 "build-up" of high-density interconnection layers.
i+N+i (i≥2) - PCBs contain 2 or more "build-up" of high density interconnection layers. Microvias on different layers can be staggered or stacked. Copper filled stacked microvia structures are commonly seen in challenging designs.
Any Layer HDI - All the layers of a PCB are high density interconnection layers which allows the conductors on any layer of the PCB to be interconnected freely with copper filled stacked microvia structures ("any layer via"). This provides a reliable interconnect solution for highly complex large pin-count devices, such as CPU and GPU chips utilized on handheld and mobile devices.
0-N-0 with laser microvias:
In this stack up, the manufacturing steps are as follows:
Core is laminated
Core is mechanically drilled
Mechanical drill is plated
Laser Drilled Vias are formed
Final through hole via is formed
1-N-1 with laser microvia and mechanical buried core via:
In a 1-N-1 stackup, the ‘1’ represents one sequential lamination on either side of the core. 1 sequential lamination adds two copper layers for a total of 4 layers
and there are no stacked vias.
In this stack up, the manufacturing steps are as follows:
Core is laminated
Core is mechanically drilled
Mechanical drill is plated
Inner layer is created
Sequential lamination adds two additional layers.
Mechanical drill is now a buried via
Laser Drilled Vias are formed
Final through hole via is formed
1-N-1 with microvia stacked on top of buried & filled core via:
In a 2-N-2 stackup, the ‘2’ represents two sequential laminations.
As stated above, 1 sequential lamination adds two copper layers, so 2 sequential laminations adds 4 copper layers for a total of 6 layers. Again, there are no stacked
vias.
2-N-2 with stacked microvias and buried core via:
This stackup is similar to the one above, except in this case there are stacked microvias.
Because of the stacked microvias, a couple things need to happen: the microvia needs to be plated with copper and planarized flat.
HDI Cost Considerations
When designing HDI PCBs, you need to take the cost of multiple parts based on your needs into consideration. Different aspects and parts you want to include will change the cost of the board. This will also depend on the prices of your PCB manufacturer and assembler.
The type of via, through hole or microvia, and the amount of these vias in your board can change costs. A smaller via will cost more than a larger via. This is because the drill needs to be increasingly precise as the via size decreases.
Cost will change depending on the height of the stackup. The designer should be aware of what via structure the board entails, including specifications for the hole fill, and what those features require in terms of processes and cost.
Determine the material and the amount of layers and how many core layers the HDI board will need. The most common and most cost effective core material is fiberglass.
What should I keep in mind when choosing the trace and space?
And lastly, trace and space. Have you considered reducing your trace width to increase density and ultimately reduce your layer count? Here is a brief plug on Hemeixinpcb: If you are considering reducing your trace width to increase density and reduce your layer count, 2-mil trace and space may be exactly what you are looking for. Our yields are 90% for this density.
When it comes to the manufacturability and the cost of an HDI board, it is very important to remember that none of these considerations can be dealt with in isolation.
For example, reducing your trace and space will always ultimately reduce your layer count. Or, how can you plan your via and pad sizes which impact the space you have to route your traces?
What is the most expensive stack-up class?
The more sequential laminations, the higher the cost. The most expensive stack-up class is three sequential laminations. This includes microvias stacked on top of each other, which is necessary when you are breaking out of a tight pitch BGA, like .3 mm. Second in the stack-up class in terms of cost are using a non-conductive hole through process.
How do I choose between mechanical or laser drill?
Drilling is the huge cost driver. A lot of factors can impact your decision. To name a few, there is the cost of the drill bit, the time it takes to drill mechanical holes, and the quality of the drill. A 6-mil drill is much more expensive when compared to a 10-mil drill. What can make this process even more complex is the use of hybrid materials. For hybrid materials, each material requires a different drill cycle and plasma cycle. Bottom line, if you have the opportunity to reduce or eliminate mechanically-drilled vias and use laser-drilled microvias instead, you could save a tremendous direct cost for yield.
How do I choose between conductive and non-conductive hole fill?
Do you have vias underneath a surface-mount component that is required to be filled and capped or plated over? It is costly because it requires two plating steps and two drill steps. We drill holes that will be filled separately from the regular through-holes on the board and any extra steps mean extra cost. In this case, we are going back to the process twice, which costs in terms of time and dollars, drilling and plating.
What are the critical dimensions of a laser-drilled microvia?
The critical dimensions are the pad size, the laser drill size, and the press-out thickness of the dielectric. You must define your laser drill size in proportion to the finished press-out thickness in order to properly plate the via. Laser drill dimensions can get very small. But remember, they are only going from one layer to the next. Many fabricators can laser a 2-mil hole but plating the 2-mil hole becomes problematic because of the aspect ratio of the thickness due to the drill diameter of the hole.
What is the optimal aspect ratio?
You want to stay 0.75:1 to ensure a good plating. The shape of the microvia is important to allow for the plating solution to flow properly and plate or fill the microvia. If you have to do build-up, or in another word you need a buried via, then you would need to choose between staggered or stacked vias.
What is the difference between staggered and stacked microvias?
Staggered vias essentially mean fewer process steps. We do not have to fill the laser-drilled vias with copper because the second laser drill does not land on the first laser drill. Filling or plating a microvia shut usually happens in a special plating tank designed with chemistry that plates the laser-drilled microvia from the bottom of the via to the top of the via, until it fills the hole completely. Plating a laser-drilled microvia shut adds time and cost to the process. You only need it when you are stacking on an inner layer. Or if you have a via-in-pad on the outer layer. If the second laser-drilled via is staggered or offset, there is no need to copper plate shut. If you are staggering your laser-drilled microvias, it is important to know what spacing your manufacturer requires between the laser drills.
What is the laser drill accuracy?
It is very safe to assume it is +/- 1 mil accuracy. Usually, in a staggered microvia formation, the diameters of both operate and lower microvias are the same. The key parameter that decides whether the staggering is possible or not, without the lower microvia needing to be filled, is the dimension E, the vertical separation between the central access of the two microvias. For staggering to be viable, the value of E must be greater than the microvia diameter.


